
Step-By-Step Guide To Convert HTML To WordPress Site
ByJasmin M
791 Views
Many businesses still believe in simple HTML websites for his or her online presence.
These HTML websites are usually static, meaning that you’ll have to edit the code to vary even a minor detail on the website.
To avoid that, though, you’ll convert your HTML website to WordPress.
The reasons for adding an HTML file to WordPress very much support your goals.
Sometimes the method is quite simple, like uploading an HTML file to a WordPress blog post or page.
Other times there’s a lengthy process of converting a whole HTML website with dozens of files and side jobs that have to be completed, like transferring over the website content alongside the HTML.
Convert HTML To WordPress Site

There are two ways to convert HTML into a WordPress Theme:
1. Manually Converting Your Static HTML Site to WordPress
2. Using a Pre-Made WordPress Theme and Importing HTML Content in it
No matter which route you opt to take below, there are a couple of belongings you will want to try to go before diving in.
The first is selecting a hosting plan. You’ll want to look over the choices that are out there and choose a package that most closely fits your needs. Or perhaps you’d wish to create an area WordPress installation instead? you’ll always migrate it to a hosting service later.
Once you’ve chosen, you’ll have to install WordPress and log into WP Admin. This is often the purpose at which our two possible paths divide.
1. Manually Converting Your Static HTML Site to WordPress
Step 1: Create a New Theme Folder
The first thing that you’ll have to do is create a replacement theme folder on your desktop. consider it as a directory folder on your computer. It serves an equivalent purpose.
Now, attend the code editor and make text files. There are five different files you’ll want to create:
- Style.css
- Index.php
- Header.php
- Sidebar.php
- Footer.php
Step 2: Copy the CSS Code
Next, you’ll need to copy the CSS coding from your old website onto a WordPress sheet.
To do that, you’ll need to prepare the WordPress sheet, which is the style.css file you created within the last step.
Copy and paste the CSS code from the old site’s source into that sheet.
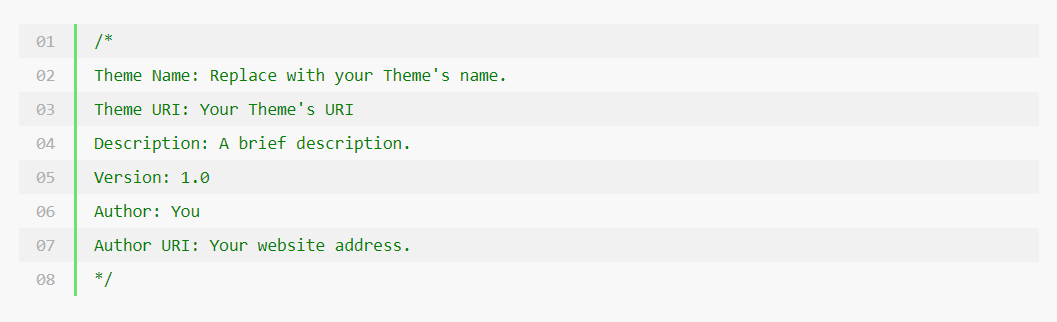
Then it’s time to fill out the varied parts of the design sheet header for your new WordPress theme.
They are like:
Theme Name – this will be anything you would like.
Theme URL – The homepage information or site address.
Author – Your name.
Author URL – Link to the homepage you’re building.
Description – This part is an optional write-up on the theme that shows within the WordPress backend.
Version – Start with 1.0.
License, License URL, Tags – This part is merely necessary if you’re getting to submit the theme into the WordPress directory for others to use. If you’re keeping it for yourself, then don’t worry about it.
Once you’re done with the header, paste the CSS code from the static HTML site into your file. Save the file in your theme folder and close it.
Step 3: Separate Existing HTML
WordPress uses PHP to access database information. As a result, your existing HTML code has to be chopped into separate pieces so that the WordPress CMS can properly string them together.
To do this, you’ll need to copy parts of the first HTML document into several different PHP files.
First, open your index.html file.
Go through the WordPress files that were created and copy that code into the following areas:
Header.php – This entails everything from the beginning of your HTML code up to the main content area. Right before the section marked you’ll have to copy and paste
Sidebar.php – This is where you put all the code from the section marked
Footer.php – This section starts at the end of the sidebar and goes up to the end of the file. Add a call before closing off the bracket.
Once you’ve done that, close the index.html file and save your other data to the theme folder.
Close all of the files apart from header.php and index.php.
Step 4: Change the Header.php and Index.php Files for WordPress
Next, you’ll be changing the header.php and index.php to suit WordPress’s format.
At the very top of your index.php file, place the following line of PHP

Replace that link with this:

The space between the primary and second lines of code is important. This is often where you’ll paste your Loop code. It’s a sort of PHP employed by WordPress for displaying posts:
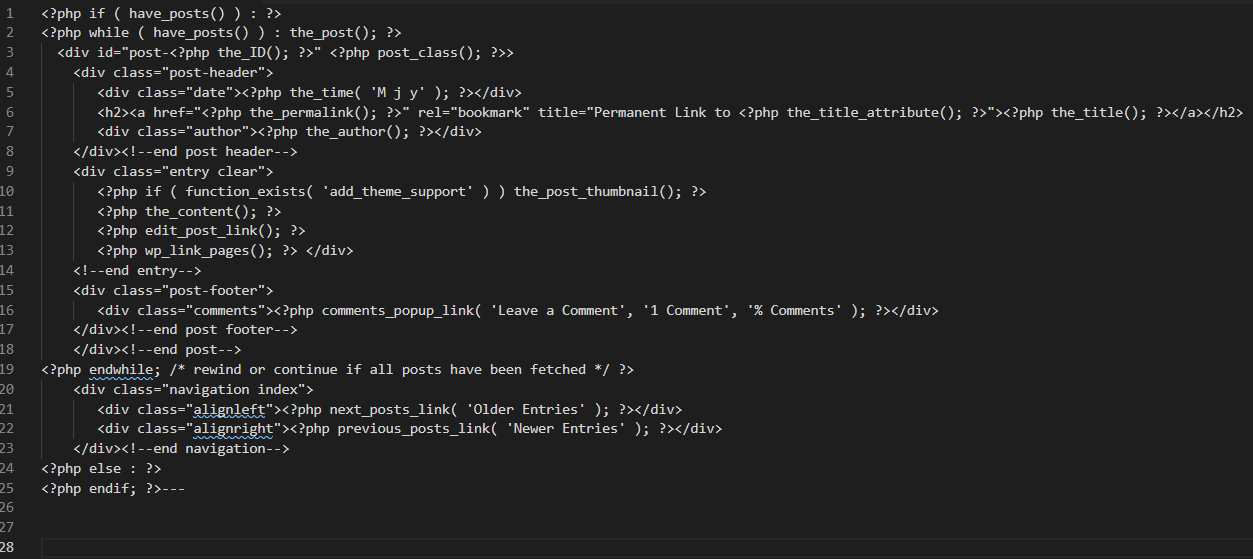
Save your index.php and close. Your theme is now finished! All that’s left is to upload it to your WordPress website.
Step 5: Screenshot and Upload
The last item you’ll have to do is create a screenshot of your theme and upload it.
The screenshot will show a preview of your site within the WordPress backend.
Take this screenshot and crop it to 880×660 pixels. Save the file as a screenshot.png.
Now, add the screenshot to your theme folder.
It’s time to upload the theme to WordPress. Take the subsequent five steps:
- Create a zipped file.
- Go to WordPress.
- Select Appearance, and Themes, and click on Add New at the highest.
- Click Upload Theme.
- Upload your zip file and click on Install Now.
Once that’s done, you’ll activate the theme!
Iconiqdesign presents some Powerful HTML Themes
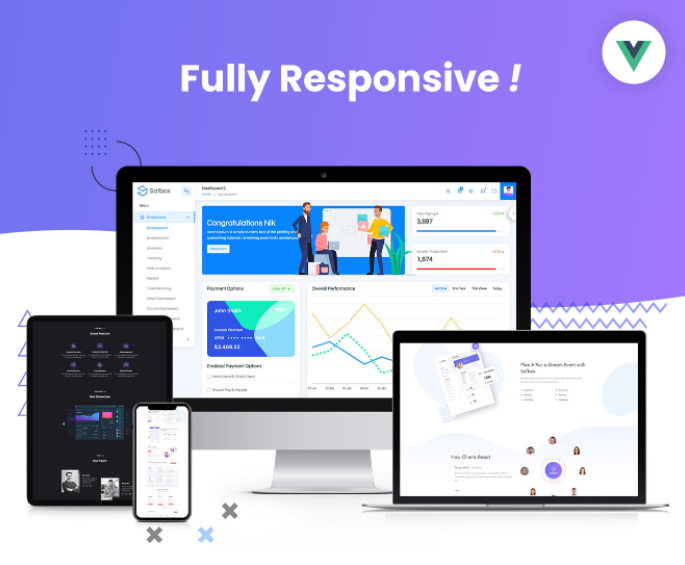
Sofbox – Angular 9 Software SaaS Landing Page | Sofbox – React JS Software Landing Page

Sofbox – Software Responsive Angular Template is a sleek, clean, and powerful Saas, WebApp, Software landing page template. With modern and stunning UI/UX elements, this template is a perfect package for any of your web projects.
Sofbox – Vue JS Software Landing Page
Know More About this amazing HTML Theme
SocialV – Vue Js, HTML Social Network & Community Admin Template

SocialV is a minimal, clean, and modern Social Network and Community dashboard template with ready-to-use pages. With many more upcoming pre-builts, SocialV’s harmonious design and super clean looks will make your site look beautiful and elegant. This template works seamlessly on all major web browsers, tablets, and phones.
FinDash – Vuejs, HTML Finance Sales Dashboard

FinDash is a minimal, clean, and modern Vue JS, HTML Finance dashboard template with ready-to-use pages. With many more upcoming pre-builts, FinDash’s harmonious design and super clean looks will make your site look beautiful and elegant. This template works seamlessly on all major web browsers, tablets, and phones.
Vizion – AI Startups Responsive HTML5 Template

Know More About this amazing Html Theme
Xamin Data Science & Analytics HTML, Angular, Vue & React Template

Xamin – Data Science & Analytics HTML, Angular, Vue & React Template comes with amazing customization features. With full creative control over its appearance, Xamin offers various options to create your website. Besides the customization tool, Xamin can be used to create an interactive website. The effects used in this Responsive theme can give an impressive look to your brand. Their eye-catching homepage banner, multiple sections, and attractive About us page make Xamin one of the most sought-after WordPress themes. The testimonial slider, portfolio, and team help promote your promising agency.
Geniot – IOT Devices Product Landing Page

GenIOT – IOT Devices Product Landing Page is a new precedent in the Internet of Things industry. With the creative blend of design and usability, this website is neatly coded, modern, and versatile. Display your smart devices like smart cars, voice assistants, smart watches, Bluetooth trackers, smart kitchen devices, home assistant devices, and other IoT solutions on this landing page template.
2. Import Content from HTML to WordPress Using Plugin
Finally, on the list of moving from HTML to WordPress is using an existing theme as is and easily migrating your content from your HTML site into it. This is often the only way – all you would like to try to do is install and activate the theme of your choice (we assume you recognize the way to do this by now) then follow the steps below.
By the way, though this process isn’t super hard, some things will fail. For that reason, confirm you copy your WordPress site before browsing with it.
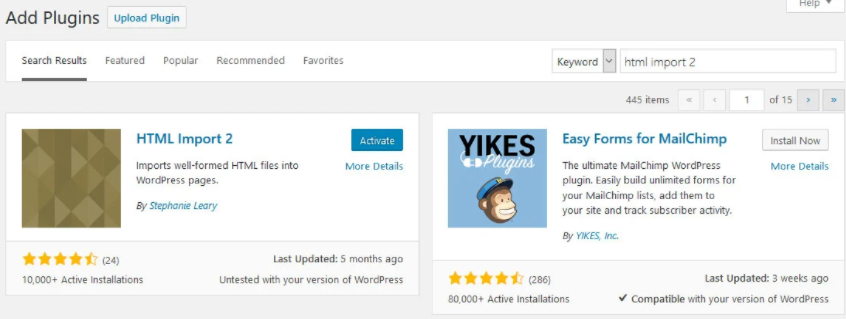
1. Install the Import Plugin
The first thing you would like to try to do is install the plugin HTML Import 2. The simplest way to achieve this is to travel to Plugins > Add New and look for it by name. Once you find it on the list (it could be further to the bottom), click on Install Now. Activate it when it’s done.
2. Prepare the Import
To import several pages directly, you would like to upload them to an equivalent server as your WordPress installation. The plugin will propose something like html-files-to-import the folder name but you’ll choose whatever you would like. Just confirm to recollect the pathname.
You can also import single pages one by one. For either method, attend WordPress and Settings > HTML Import. we’ll re-evaluate the foremost basic settings now.
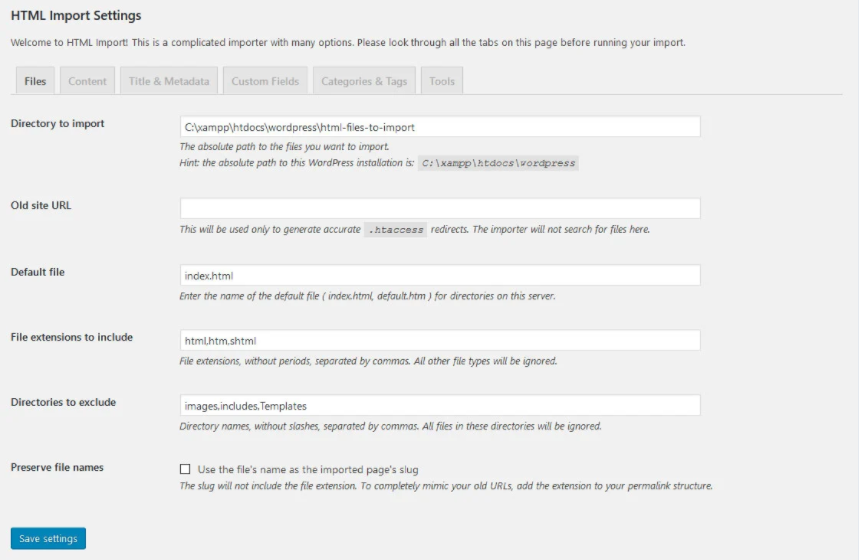
Configure this screen as follows:
Directory to Import — Enter the path that you just copied your existing files to.
Old site URL — Used for redirects. Enter your old URL. We will deal with this again later in this article.
Default file —The default file for directories on the old site, usually index.html.
File extensions to include — The extensions of files you want to import.
Directories to exclude — If you have any directories in the old site that you don’t want to import, enter them here.
Preserve file names — To have the plugin automatically use your file names as the new URL, check this box. This makes sense if your titles are very long because usually, the importer will use them to create the slug.
Content
Under content, you would like to configure the HTML tag that contains your site content.
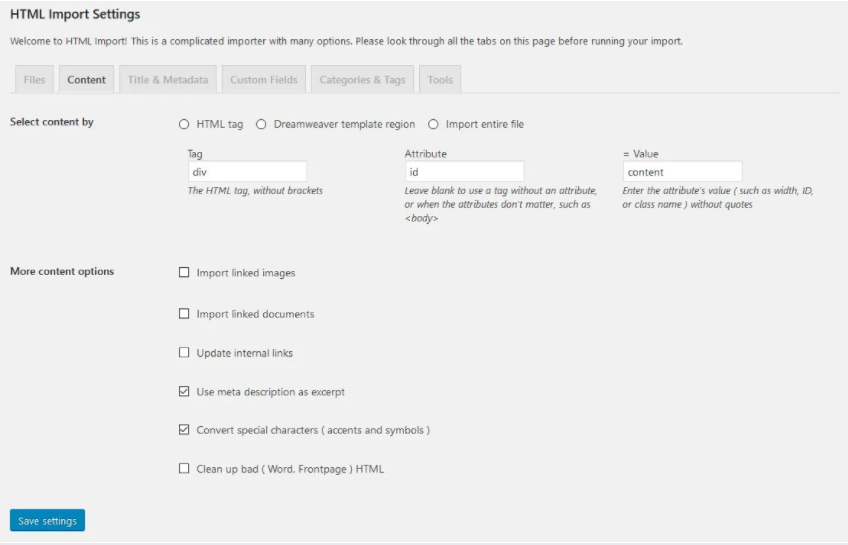
To do that, choose the choice HTML tag at the highest. Then configure the tag within the following three fields. for instance, if your content is contained during a tag called, the knowledge you input would be div, id, and main.
The other settings on this page should be self-explanatory and enable you to import images, and documents, update internal links, and more.
Title & Metadata
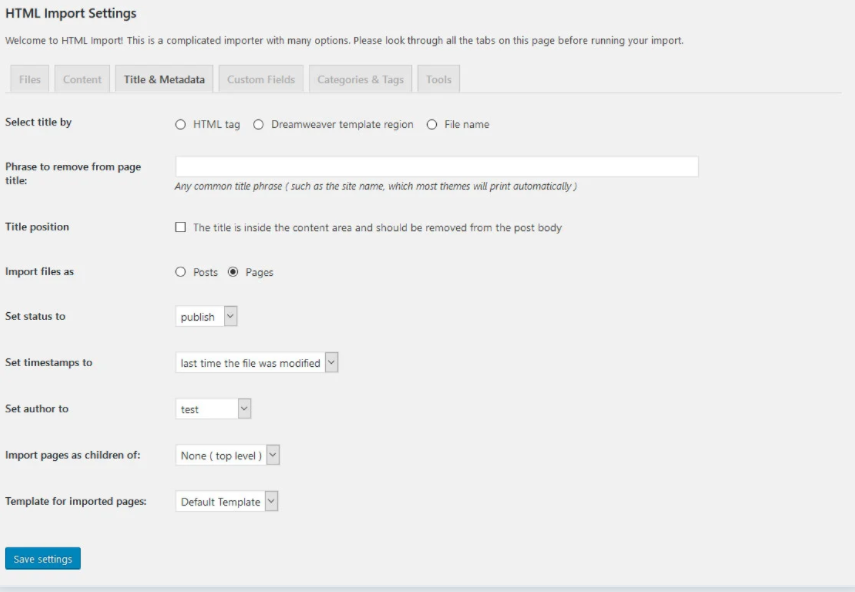
This part is analogous to the content part before. However, it’s handling page titles. within the beginning, you would like to inform the plugin how titles are marked in your HTML template so it can import them into the proper place.
In addition, you’re ready to filter redundant things just like the site title as that’s often displayed by WordPress themes by default. If your titles reside inside the content, you’ll also tell the importer to delete them so that they aren’t included twice.
What’s important is that you simply decide whether to import your old content like posts or pages. The remainder is quite self-explanatory and allows you to configure WordPress settings for brand-spanking new pages.
Custom Fields

If you have any data that needs importing into custom fields, you can configure this here.
Categories & Tags

Tools

This screen lists several useful tools for successfully importing from HTML to WordPress.
3. Start Importing
Whenever you are done, save the settings. This will empower the Import Files button. Snap it to begin.

(Note: you can likewise arrive using Tools > Import and afterward picking Run Importer under the HTML choice.)
Then, pick whether to import a registry of records or a solitary document (you need to peruse it), at that point hit Submit. The module will at that point go to work.
Once done, you ought to have all current substance on your WordPress site and organized by the new subject. On the other hand, if you go to one of the different courses, your webpage should look fundamentally equivalent to your previous HTML site. Pleasantly done!
Extra Steps
If you plan on sending the WordPress webpage in a similar spot where the static HTML site used to be, there are a couple of more activities before you finish.
The first is to check the URLs of your recently imported presents and pages to ensure they are web search tools well disposed of (for example incorporating the watchwords you need to rank for). It’s straightforward – simply go to a page or post and take a gander at the URL beneath the title.

To transform it, click Edit on the right, change the URL to your decision, and hit OK.
Something subsequent is to carry out diverts from the old URLs to the new ones. That way, you will not miss out on existing SEO esteem.
On the off chance that you have filled in the old site address in the HTML module, it will make the divert code for you. You can reorder this into the file.htaccess that dwells on your worker (normally in the root index).
You access it utilizing FTP, nonetheless, you may need to empower yourself by being covered up to be as it isn’t noticeable. At that point alter .htaccess and input the guidelines.
Know that it possibly works on the off chance that you have left the URLs unaltered. On the off chance that you haven’t and need to set custom sidetracks, utilize the Redirection module. It’s an entirely agreeable arrangement that additionally tracks at whatever point someone lands on a non-existent URL on your site. That way you can carry out diverts for those connections too.
Iconiqdesign presents some Powerful WordPress Themes
Mill | Industry Engineering Factory WordPress Theme
Mill is a perfect theme for any Industry or Factory website. Are you into manufacturing and industrial works, and looking for a theme that is a perfect blend of design and functionality? Mill is the best match for you.
Mill theme features a one-click demo import, Slider Revolution, About Us page, FAQ page, Team, Blog, Projects, and a full-blown Service page, to name a few. The versatility and practicality of Mill ensures a quick and effortless powerful website.
Epy | Event Conference WordPress Theme

Epy is a powerful theme for event and conference websites.
EPY – Conference WordPress theme is a professional-looking web design that is ideal for educational events, conferences, webinars, shows, concerts, forums, and the list of different digital gatherings. With Elementor, it is straightforward to create your forthcoming event website. Expert developer or an amateur freelancer, EPY can quickly set up your site in minutes. No coding is necessary when performing customizations.
EPY – Event WordPress Theme comes with three interactive homepages, a slider, an event detail page, a speakers page, a registration, an event schedule, a ticket plans page, a blog page, and a contact page. It is indeed in tune with all the popular plugins so you can create the exact page for the upcoming event. It also has complete documentation and optimized code. So, start selling tickets to your event right away with EPY.
Umetric – WordPress Dashboard, Reporting, and Infographic Theme

Umetric is a Reporting and Infographic theme for WordPress. Create beautiful presentation sites with various charts and data visualization elements. Umetric is perfect for creating WordPress Dashboards, Marketing reports, Reporting SaaS landing pages, and Data Visualization.
With our exceptionally professional support, you get Umetric bundled with all the benefits of a developer. You can hyper-personalize your website experience. With a mega bundle of powerful plugins for absolutely FREE, you can build your unique project flawlessly. The Elementor plugin allows you to create pages in the least time allowing you to deliver your client’s project easier, faster, and better.
KiviCare – Medical Clinic & Patient Management WordPress Theme

Kivicare is a 1st of kind theme with a fully functional clinic management solution built into it. You get a complete Appointment booking engine, Patient records, Medical history, and much more. Kivicare is packed with fully customizable Elementor widgets. Our ultimate Clinic management theme is powerful & functional. It would save you 1000+ Hours and dollars for setting up software for your clinic. Its 200+ Theme Options allow crafting almost any imaginable design.
Streamit | Video Streaming WordPress Theme + RTL

Streamit is a powerful WordPress theme for OTT Streaming platforms. It is a sleek and clean-looking Theme. With some unique features and stunning UI/UX elements, the StreamIt WordPress template is a perfect package for any media video, movie, or show streaming-related web applications.
It has beautiful front-end pages, a fully functional admin panel, a rating list, and a user list. You can add movies as well as shows on Streamit. You’ll get a ready-to-use login page and pricing page. It is an extremely functional and easy steering feature. Streamit is perfectly apt for creating video blogs, video tutorial sites, and podcasts. Your Streamit is a responsive website and is fully adaptive.
Foodsto : Grocery & Food Store WordPress Theme

Foodsto – Grocery & Food Store WordPress Theme is perfect if you are willing to create a personal online food store. It is ideal for organic food and Fresh farm vegetable store website projects. With a clean, minimal, and fresh design, your website will look great on all devices. Start your simple food store website easily and start selling online without any hassle.
Talkie – Chatbot and Tech Startup WordPress Theme
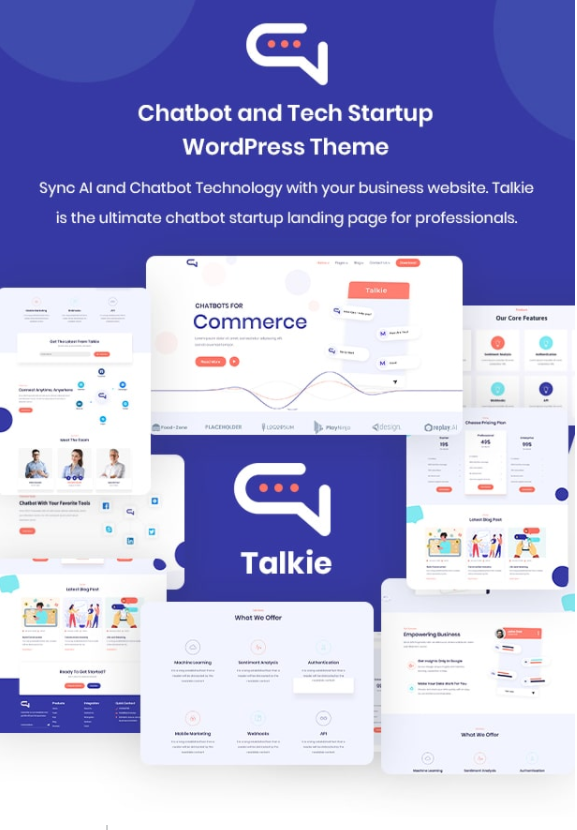
Looking for a chatbot theme that works right away? We introduce you to Talkie. Make your websites efficient in conversation and interaction by using our chatbot WordPress theme – Talkie.
With the internet bringing instant access to the massive amounts of data at our fingertips, Talkie is a perfect theme for creating websites for Event & promotional sites, content marketing agencies, bank loan application bot services, stockbrokers chatbot services, lead generation for real estate professional bot services, legal bot services, mortgage application bots, automation, and other industry-specific businesses.
Xamin – Data Science & Analytics SaaS WordPress Theme
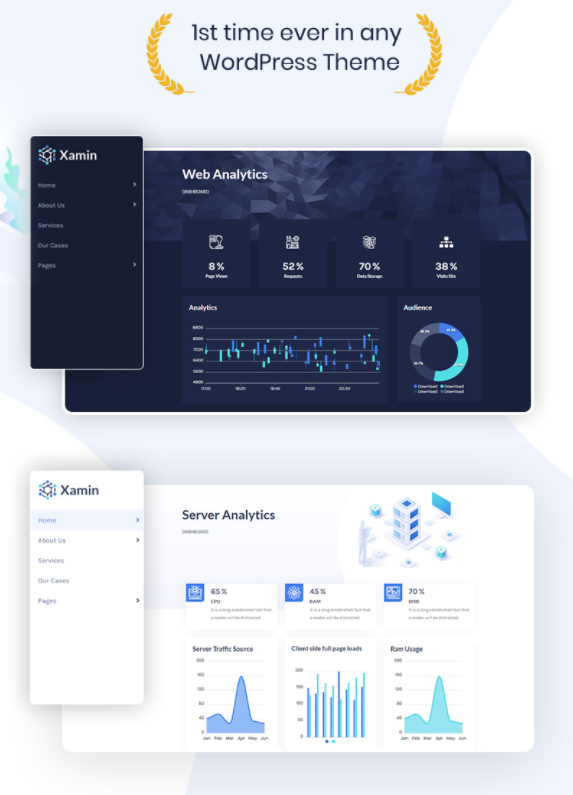
Xamin – Data Science & Analytics SaaS WordPress Theme comes with amazing customization features. With full creative control over its appearance, Xamin offers various options to create your website. Besides the customization tool, Xamin can be used to create an interactive website. The effects used in this WordPress theme can give an impressive look to your brand. Their eye-catching homepage banner, multiple sections, and attractive About Us page make Xamin one of the most sought-after WordPress themes. The testimonial slider, portfolio, and team help promote your promising agency.
Each page is fully responsive and retina-ready, making your creation look good on any device.
Hire us for web or app design.
Was this article helpful?
YesNo


